Wednesday, 14 June 2017

A closer look at Stampede V3 kit

The satisfying 'ker-chunk' of the Stampede's AEG bolt system has an enduring appeal even now, more than 7 years after it first hit the shelves. Our V2 upgrade kit has been steadily popular but the time has come to implement some bug fixes and make it even easier to install.


The key difference with the V3 is that it used a bare bones copper PCB to mount the through hole components to. No longer will you need to solder bare wires to the bottom of the relay. Instead, fit the relay to the board and solder the pads directly to connect everything up. The wires are replaced by the copper traces in the laminate.


You can also fit the MOSFET and the resistor the same way to keep things nice and tidy. The the entire assembly can then be bolted to the rear bulkhead using a 3D printed piece, a M3x10 bolt and locking nut.


We retain the stock mechanism switch in order to protect the cycling system from over run and general bugs. The stock loom can be wired to a JST line and then plugged directly into the board using the V3 kit. We provide two header pins for the stock mechanism switch and the blaster's on/off switch to be plugged in.

The complete kits includes all the wiring lengths you need, all the JST plugs to solder to the stock loom, heat shrink tubing, fuses and fuse holder, all the through hole components (relay, FET, resistor, header blocks), the PCB, a battery connector of choice and of course our standard 6kg Stampede upgrade spring.

The entire V3 kit is available for £18 (correct at the time of writing) via our website. Dispatch time is subject to our lead times policy.

Saturday, 17 September 2016

Updated Wiring Kits: More Choice, More Firepower!

We're always looking to expand the range of our kits for various blasters and as such we've revamped our wiring kit offerings. Now that we're stocking MTB Hellcat 180 motors, some of our older looms need a bit of a shake up to be able to hand the insane levels of current that these motors demand.

To that end, we've created several new lines and consolidated a bunch of products. We've merged all our semi-automatic blaster wiring looms into 2 listings: SA Standard Power and SA High Power MOSFET wiring kits. We've taken the decision to offer MOSFET kits in all cases (well, except one) for the sake of simplicity in installation. While a micro switch offers a marginally simpler circuit, a micro switch install requires a good deal of grinding and gluing to get to fit. Generally speaking, wiring in a MOSFET that uses the stock trigger to switch handle high current loads is faster to install than a micro switch and presents with far less cleaning up. Plus it has the benefit of removing high current switching gear from the trigger group (in most cases).

We have our universal wiring diagram for semi-auto blasters, just swap in the appropriate lengths of wire and the right MOSFET for your motor combination (supplied with the appropriate kit) and you're good to go.


In addition, we've created the new High Power Rapidstrike wiring kit that contains a heavy duty MOSFET to lift the amount of current demanded by a Hellcat 180 flywheel motor with Honey Badger 130 pusher. More details below.

Standard Power Wiring Kits:
These are designed for your stock, MTB Rhino and MTB Honey Badger motors on LiPos that don't have too much in the way of current demand and have been proven over the last year or so to be resilient and effective. This category contains our Stryfe, Demolisher and other semi-automatic blaster wiring kits that you might have become familiar. They use 49A rated MOSFETs and 18AWG silicone coated wire. For the first time, we've also added a Rayven wiring kit and are currently adding new kits for blasters like the Desolator. The Fearless Fire and Doomlands Incisor are also on the way.

Our standard Rapidstrike switch kit and the Rapidstrike wiring and switch upgrade kits both fall into this category and remain unchanged.

High Power Wiring Kits:
MTB Hellcats are primarily responsible for this one because they draw 22A at stall, more per motor than a pair of Rhinos combined. For these, a higher powered wiring kit more akin to the Rival Zeus wiring loom is needed so we've added a 130A rated MOSFET and 16AWG wire in order to minimise resistance in the circuit and to get the best out of your blaster.

For the first time we're also in a position to offer a high powered Rapidstrike kit in order to meet the need for the insane combination that is a 3S MTB Hellcat/Honey Badger flywheel/pusher set up. The stall current for this rig comes in at ~65A and so a beefy 130A MOSFET coupled with 16AWG wire gives you the best possible current carrying capacity and in turn response time and muzzle velocity at higher rates of fire.

Stryfe Micro Switch Kit:
We have chosen to retain the Stryfe Micro Switch kit as a mechanical option for stock motors on 3x IMRs and a dummy cell. For the novice modder, a simple switch circuit can be a good entry route into the world of electrical modding without the hassle of LiPo. It won't give you the best blaster in the world but it's a good start. This kit can handle LiPos but isn't guaranteed to, the switches have been known to melt after extended use.

So there you have it, a bunch of new products and simplified listings. The march of technology for flywheel blasters is ongoing. MTB Hellcats can average 130FPS in a Stryfe with just stock flywheels and cages, something that was unthinkable a year ago. By supplying these kits, we hope to get as many players running cutting edge, competitive blasters at their games.

If you've got any questions or need a hand, the folks over at BritNerf are always great for a chat and generally useful. If you've got a specific order enquiry then please don't hesitate to get in touch.

-Mike
MD, Blastersmiths UK

Monday, 29 August 2016

Stryfe Magazine Release Levers

Release levers for the Stryfe have been around a while now and a number of different places offer them as a quick printed option. This Green Cloaks season, however, I've seen 2 of them snap and more than a dozen times I've seen accidental magazine drops because the lever is too long. To that end, I took on a client's request to produce a lever that balanced security with ergonomics. We tested it extensively during the last event of the year and I'm happy to say here it is.


It's small and mighty, doing the job. It's rock solid but adds enough length over the stock button version that you can get your mag out of there without the problems associated with a longer lever.


These new levers are also available in our full palette of filament colours ranging from grey to white with two shades of blue and green in there among others.

Versions for other blasters are in the pipeline, too. I'm currently looking at the Rapidstrike, Demolisher and Modulus. Once I get my hands on a Desolator that'll join the list, too.

Stryfe Magazine release levers are available for £3.50 per unit from our website from 29th August 2016.

-Mike

Monday, 2 May 2016

Er, slight tweak to the previous... - 3D Printing Service

This has to be have been one of the weirdest decisions of my business career but here it goes: Blastersmiths UK cannot offer black 3D printed products until further notice. If you've paid for black parts and have them outstanding, you'll likely get an email shortly offering you a refund or choice of other colours.

Why is this cropping up now? Well, story time. The closure was triggered by contaminated black filament bricking our entire suite. We literally lost entire printers to a gunky mass of dust and otherwise contaminated PLA. It did all sorts of numbers on our hardware. We had to strip down, clear, rebuild and reconfigure large chunks of it to get ourselves operational again. Those printers would literally not print because of damaged parts caused by contaminated filament. We've done that over the last 2 or 3 weeks. The printers had been functioning solidly for 24 hours before we made yesterday's announcement across a range of colours. The premium black we were using was flowing fine and all was good. Then after a fixed number of printer hours, our hot ends started refusing to print black - of any brand or quality. We were able to reproduce the bug and we can confirm that our hot ends will not feed black filament past 2 hours of printer time, irrespective of contamination. They will clog, we clear them out and swap to another colour and everything prints fine. We can even switch back to black each time and get another 2 hours. The window between the start of printing in black and the first failure was ~24 hours but now we're down to a reproducible window of roughly 2 hours. Sadly rotating through colours is not sustainable as the failure often occurs mid print resulting in lots of wasted time and filament.

We have no idea why this bug has cropped up now when we've printed dozens of kilos of black filament in the past year. We are in touch with our hot end manufacturers and both filament suppliers to see what's what. The bug is sensitive to the quality of filament, too: the premium grade stuff we're using as a stop gap has a better half-life than the last of the known good bulk stuff but the bug is still there. The weirdest part is every other colour we can print does that - it prints! To that end, we can only offer non-black parts until we resolve this.

On the bright side, I've got some silver and brass filaments I'm going to be adding to the options to widen the array of colours available. I'll be looking to add more in the coming days.

As weird bugs go, this one takes the biscuit. We really are scratching our heads on this one. :D Black parts will be restored to the website as soon as we've fixed this bug...

-Mike Harratt
Blastersmiths UK

Sunday, 1 May 2016

We're back in black! - 3D Printing Service Re-opens

We're back! After 2 and a half weeks of herculean effort from our team, we're back with our full range of products with the printers ready to work flat out to fill orders. We're still clearing a bit of a back log and we're still a couple of printers down but we've got things in hand. The frames that are offline are due to come on stream in the next week and the ones that are running have more capacity than when we closed.

We are currently using emergency stop gap filament to print black but it's literally the best stuff you can buy so there aren't any concerns there. It will print until judgement day and is just lovely. We'd use it normally were it not for the obscene cost. Orange and dark blue remain unchanged and we've been able to build up a bit of stock of products in those colours while the entire suite now begins to catch up with black parts orders.

What's next? Well, as I said, we've got a couple more printers to bring back on stream in the next week. The parts for those will be here Wednesday so I'm expecting full operational capability by next weekend. That'll give me 80% of the printers (and capacity) I need to cut the lead time from 4 weeks to 2 weeks. From there, we've just bought a new configuration of extruder drive that will allow us to print using direct drive rather than using our current Bowden tubes. That will let us print faster, with more precision and less post processing to remove over-extrusion dribbles and strings. Once installed on our current frames, it should provide us the last 20% of capacity that we can use to drop the lead time permanently to 2 weeks. The best part is that it's built for exciting new materials like NinjaFlex and other flexible 3D printing filaments so we can really start to expand our capabilities in the next year or so. From there, it'll be a case of simply adding more frames to add to our capacity. We're pretty happy with the home-brew system we use and it's built to scale up perfectly to as many printers as we need.

It's been a long few months and I'm reasonably confident our bulk supplier has changed things up their end sufficiently to prevent a repeat of this mess. The breathing space this closure has given us has allowed for some serious upgrade planning in the next few months. With the new drives and a few other bits and pieces that we're working to bring to the suite, we're coming out of this in better shape than we came in.

Thank you again to everyone for their support over the last few months, it's very much appreciated.

Mike Harratt
Managing Director
Blastersmiths UK

Thursday, 28 April 2016

Update II: 3D Printing Service Closure

In an effort to keep everyone up to date as much as possible, here's another update.

First the bad news: we received a shipment of filament from our supplier late last week. Upon inspection of the batch numbers, it was from the same contaminated batch that bricked the suite the first time out. Needless to say, we were exceptionally cautious about feeding it through our hot ends and so have left it in the boxes. Efforts to contact the supplier were slightly hampered by Green Cloaks E1 at the weekend. However, I've received an email in the last hour from our guy over at the filament manufacturer apologising and promising to get us a new, non-contaminated batch sent today. That means our bulk black should be here Monday. In the mean time, I've got a UK supplier I'm going to call to see if I can get some filament from them posted to us for tomorrow. That way, I can get black printing before the weekend and the re-opening of the service. Otherwise, we are printing happily in every colour that's not black.

And then there's the good news: we've been adding capacity as we go during the closure; tweaking bits and pieces. We've made some modifications and tweaks to our existing printers to vastly improve their foot print and with good quality filament, we'll be able to increase their speed too. That means even more capacity than we were expecting before the extra frames come online.

Thank you again to everyone for your support during this difficult run. We've been working hard to make best use of the time given to us by this closure. When we open again, we should have enough capacity to start development again and bring you shiny new things.

Mike Harratt
MD, Blastersmiths UK

Sunday, 17 April 2016

Update: 3D Printing Service Closure

I just thought I'd post a quick update on how things are progressing at this end with regards to our printer services. We've managed to restore 50% of capacity at this stage and it's remaining stable. We're currently awaiting parts for the other 50% and that should come back on stream week beginning 25th April. In short, in terms of capacity we're on track to re-open on 1st May as previously predicted. I'm also going to return the Rapidstrike wiring kits to the site since we've got our main printer for those back and can produce those  very, very quickly. Given that colour for those doesn't matter, they're the first thing to return to the website.

We are, however, still stuck in terms of black filament. It was black that knocked us off line in the first place. We're down to our last half kilo of known good filament and our reserve supplier can't supply enough to feed the beast as it were. Our original supplier is still over-hauling their machinery and processes to prevent a repeat of this episode. That will take sometime, apparently. I've got kilo after kilo of orange and blue filament ready to go so if I contact you with regards to your order, you will very likely get an offer to change over to another colour free of charge. Of course, a full refund is still on offer if your order is delayed and hasn't been posted or we can delay your order until the black filament situation is resolved.

So yeah, that's how things are at this end. Thank you everyone for your messages of support. It means a lot to know we have such a great community behind us that'll stick by us even in the tough times. In return, we'll do everything we can to keep the communication channels open and keep people in the loop.

Thank you all again,

Mike Harratt
Managing Director
Blastersmiths UK

Wednesday, 13 April 2016

3D Printer Service Closure: 13th April - May 1st 2016


As of today, 13th April 2016, I am closing the Blastersmiths UK 3D printing service to new orders to retail clients until 1st May. Our resellers will still be able to order stuff but we will not be accepting website orders from the general public until the start of May.

I hate having to do these sorts of posts but it's for the best at the end of the day. We need some breathing room to fix some pretty serious problems that have occurred that have been out of our control. I've detailed why I'm taking this step but the tl;dr is I need to look out for my staff and to keep the promises we make to our clients who are good enough to trust us with their hard earned money.

I ordered on [date], when will I get my stuff?
Current orders will be processed in the order they were received but the lead times might be a little elastic and each individual client will be kept up to date via email as we go. If it looks like your lead time is going to breach, you will be the first to know. In all cases, the offer of a full refund is available, no questions asked, should you wish to take that option. The only caveat is that your order mustn’t been dispatched.

What the hell happened?!
3 things. First, we're in the process of replacing our old Prusa Mendel fleet with better printers that are more reliable, print faster and print the mirror finish that can be seen on our Stryfe tray expanders, among other printers. We're in the process of migrating as the old Mendels fail and become time sinks to repair. While those are being decommissioned, we're adding new MTW printers and working out the scaling bugs. That process is putting a lot of strain on our team who have to juggle printing actual orders with printing parts for printers and routine, preventative maintenance.

Second, we're getting hugged to death by orders - even when we're adding an average of a printer a month. We've received a large surge in the last couple of days and are already pushing at our 4 week lead time for printed parts in 75% of orders. With a migration in progress, it was going to be a stretch to cope even with adding extra capacity. With my team juggling that migration and adding extras, a brief closure is good for their sanity in the long run. :)

However, the straw that broke the camel's back was a filament supply problem. Our suppliers produced a batch of black that contained significant degrees of micro-contamination that accumulated in our hot ends and rendered 90% of our capacity inoperable in the space of a few hours. The process of clearing, repairing parts and sourcing new filament has taken a significant amount of our time (on the order of 2 weeks), obliterating our capacity in the process. With our team stretched as it is so we opted for some breathing room to give us time to sort this mess out. We have human beings at this end and their welfare is my first priority followed closely by keeping our promises to our customers.

With this brief closure, my team can focus on salvaging our current capacity and adding more while we work out the issue with our filament supply. We have enough known good filament in reserve to fill outstanding orders and an emergency alternative standing by if that doesn't cover everything. We've planned for this contingency for a long time and I'm sad to have to activate it.

On the bright side, once we're back on line we should have twice as many printers printing twice as fast.

Can I still order stuff while you're offline?
It's technically just the website that is closing so yes but your lead time will start on 1st May and will be six weeks - don't expect your stuff to leave us until mid-June. If you want to order stuff during the closure, drop us an email and we'll work via PayPal invoice. I hear you ask why can you take PayPal orders but not website ones? Well, we have some limited capacity available so we'll be able to cope with a lower order volume and closing the website should stop us getting hugged to death. This way we can balance keeping a core element of the business alive while being able to recover from quite a serious set of knock backs.

What about your other lines?
Tactical gear, embroidery work, springs and motors are not affected. However, please note that the part shipping rule still applies. We've got enough going on here in the office without needing to track half-deliveries. The more we do that, the more risk of something going wrong and we hate to disappoint our clients.

If you've any questions or enquiries then please don't hesitate to drop us an email and we'll have a chat. :)

Thank you to all our clients, partners and friends in the community,

Mike Harratt
Managing Director, Blastersmiths UK

Wednesday, 13 January 2016

Blastersmiths UK MOLLE Assault Vest

I wrote back in May about the Full Tactical vest. Well, LARP season and real life got in the way and it took a bit of a back seat. Testing continued and we were able to verify the design - it's probably the most tested thing we've ever done in hindsight. That prototype has been dragged through four weekends of solid use and it's still standing.


Well, it's finally here. After all that testing and punishment, it's ready to leave the nest and join Nerf wars around the world!

Our Assault Vest comes with 4 in-built magazine pouches with elastic tops with plenty of MOLLE for the addition for further magazine pouches, holsters or other MOLLE mounted elements.
Or yah know, as a knife sheath?
One of the key distinguishing features of the MOLLE Assault Vest is the sling loops. They have multiple uses, as Jangular highlights in his review but the intention is to use them to mount a single point sling with associated blaster.

The top 2 rows of MOLLE on each side of the 2 front panels are made from Velcro loop tape. This allows you to put Velcro hook tape backed morale patches and the like.

The back of the vest is completely covered in MOLLE webbing and allow for extensive customisation. There is also the space for embroidery. It is possible to replace several rows of MOLLE with a 180x180mm logo that you've had digitised using our custom embroidery service for an application fee of £10 inc VAT. If a smaller, more subtle logo is more to your taste, the sling loops themselves can be embroidered for a £4 inc VAT after you've had the artwork digitised with your logo.

The Blastersmiths UK Assault Vest can be purchased from our website from 14th January 2016 for £60 including VAT (a few colours and camouflages are a individually priced). Every vest is tailored made by hand here in our UK workshop. We will email you after your purchase to ask for your measurements, we'll then make it in your size. There is a little space for adjustment should your body shape change or if you'd prefer a looser fit.

Wednesday, 18 November 2015

Custom embroidery service now open!


We've always been committed to making tactical gear that people can truly call their own. Through custom sizing to 'made to order' & bespoke pieces, Blastersmiths UK have always gone the extra mile to help you make your kit suit you. In pursuit of that, we can now announce that we are launching our bespoke embroidery service as of today.

Take your own logo or artwork, pay for the tooling once and you can use your logo again and again across our entire range of tactical equipment! Your one logo can be replicated across holsters, dump pouches, magazine holders and even tactical vests. With only a nominal application fee per item after the initial charge for digitizing your artwork, our customers can readily stand out from the crowd with top quality tactical equipment that is truly their own.

Purchasing your first bespoke embroidered piece:
Custom logos can be put on all sorts of products!
First, there's the tooling. We take your digital artwork and turn it into a file that our CNC embroidery machine can understand. To get us to do that, head over to our Custom Embroidery Tooling page and select your number of thread colours. Add that item to your basket. Now, select your desired item from our huge range of made-to-order tactical equipment and add that to your basket, too. That first price includes your first application fee so there's no need to do anything extra. If you want further items embroidered with the same logo, select the 'Reuse' option on the Custom Embroidery Tooling page and you'll only be charged the application fee. We will rotate, scale and generally muck about with your design to get it to fit to pretty much anything. If we can't get it to fit, we can put it on another item in your order or will just straight up refund you the price of the tooling.

After you've ordered, we'll email you to ask for your artwork. Once we've got that, we can turn it into embroidery for you. We'll send you a digital render of the final layout for you to 'proof'. That's where you check spelling, layout and final colours. If you OK that, we can then proceed to making your stuff. We'll also provide you with a Unique Tooling Code (UTC) for each logo/artwork that you  agree to 'proof' so you can use it for future orders.

Reusing your tooling for future orders:
If you like your customised items then you can come back and select the 'Reuse' option on every future order and will only have to pay the application fee. Your tooling can be used time and again, just add Custom Embroidery Tooling with the 'Reuse' option selected and we'll email you to ask for your UTC. Don't worry if you can't find it, we keep a database of them here but it will speed up the turn around time for your order if you can provide us with it.

Stock logos and designs:
Stock designs allow for budget customisation
For those without a desired logo, we have a bunch of stock designs and logos that we can produce for just the application fee. From biohazard symbols for the HvZ players out there to simple skull and crossbones motifs, we've already done the tooling. We'll keep adding to that library as we go. The shopping process to add them to your gear is much the same as custom logos, just add Stock Embroidery Tooling to your basket with the desired pattern option selected. Again, if there are multiple items in the basket, we'll drop you an email to confirm what's going where. :)

Please note that due to the nature of the embroidery process, it's not possible to retrofit embroidery to extant pieces. We honestly tried but webbing and fittings get in the way of the embroidery hoops preventing the fabric from being held in-situ correctly.

Patches, name tapes, text only options and more
We're launching today with our custom logo service but we'll be adding more lines as we go. Plans are in the pipeline for custom webbing or hook tape name tapes for squad members and LARP characters. We're exploring the option of promotional merchandise (for both ourselves and Nerf groups) and of course we're working to bring a bespoke morale patch service, too. That'll likely be after Christmas now but we've got lots to be starting off with...

Friday, 30 October 2015

'Star-lord Quad Blaster' drop-leg holsters


Star-lord Quad Blaster - Source: Nerf Wikia
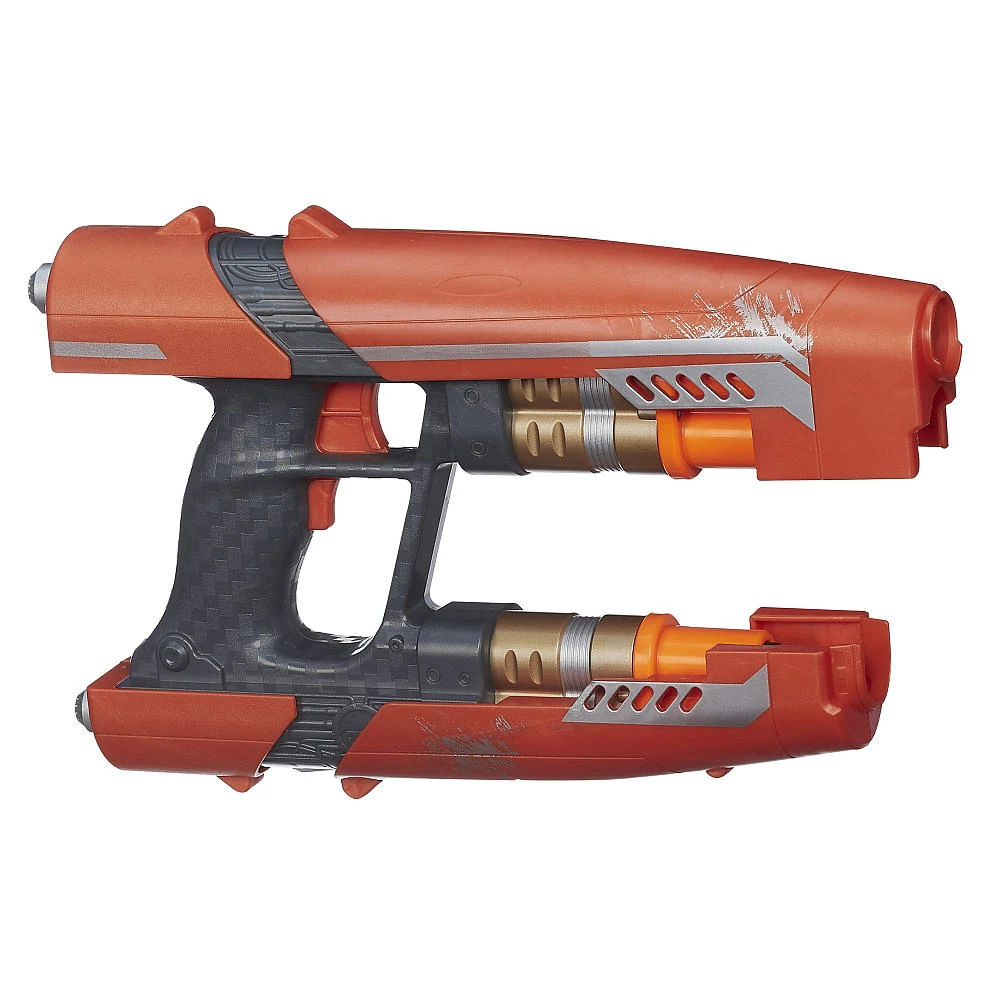
The Star-lord Quad Blaster is something of an under-rated, often ignored blaster in the Nerf community. Its single shot action with sub-par performance means it's often left out for better side-arms like the Hammershot and Strongarm. What it does have, however, is a certain style and it pairs very well with Star-lord cos-plays. We decided to make a holster for it.

We first made a set of holsters for the 'Star-lord Quad Blaster' back in 2014. One of our flat mates here in Bristol wanted a set to complete her Star-lord cosplay. We made them up and she wandered around MCM London back in October 2014 getting compliments on both the holsters and her general costume (with hindsight, should have given her some business cards to hand out!). We left them as a one-off item until a couple of weeks back when we received a request phrased to the effect of"This might be the weirdest thing you've been asked but..." I'm not entirely sure the client was prepared for us to come back with a "Yeah, we've done that, let me find my notes". :D
So we opened up the files, fixed a few bugs and ported the holsters from the old looped belt loops to our standard MkIV style loops fixed to a thigh strap. The blaster is still held in place by a 3D printed clip but it's much easier to release that the previous version. It's low profile when empty and holds the blaster perfectly secure when in use. The best part is that it retains all the sizing flexibility of our full fabric drop-leg holsters. The thigh strap is a full 30" long so chances are, it'll fit you there. The vertical belt loops have the better part of 8" vertical adjustment which is a lot when you consider your legs.

These are available now for £15 for one or £25 for a LH/RH pair (because, honestly, who really wants just one?) from our website. Prices include UK VAT at 20% so non-EU folks will pay £12.50 and £20.83 for singles and pairs respectively - that discount is automatically calculated at checkout.

This is the first release of a few to come in the next few weeks. We've been a bit quiet since the end of LARP season setting up new and exciting things that will be announced in the coming weeks.

-Mike
MD, BSUK

Monday, 17 August 2015

Retaliator Bolt Action Conversion Kit available soon!

 
In days gone by it was a simple thing to acquire a performance bolt-action rifle. You simply headed down to your local store (online or brick and mortar, your pick) and grabbed either a Longshot or a Longstrike. Nowadays, things aren't so simple. The Longshot re-release has its own problems and the Longstrike's indirect plunger system and general poor performance leaves it lacking in the Elite era.

The Retaliator is a solid platform, one that is versatile and customisable to boot but has a nasty over-hand priming action in its stock form. Well, I decided to fix that.

This ambidextrous kit allows you to replace the over-hand action with an aluminium bolt handle. The kit contains all the 3D printed parts, screws and nuts you need to make the conversion. A little bit of thread lock is all you need to make it super-durable and to last over an extended time. The kit contains a single bolt handle that can be placed on either the left or the right hand side of the assembly depending on your preference.

Miss your top rail? We at Blastersmiths UK feel that the Retaliator's top rail just gets in the way so we got rid of it. If you're pining for its return then we do offer split picatinny rails that can restore it. They will be offered as an additional option to the kit in matching colours. If you wanted a different colour for something a little more distinctive or striking, they can be ordered separately.

This kit will be on sale for £25 (inc VAT at 20% so £20.83 for US and other non-EU countries) from Friday 21st July 2015 on a 4 week lead time in our full, and growing, range of colours. A full fitting video and demonstration will be coming shortly.

- Mike

www.blastersmiths.co.uk

Wednesday, 15 July 2015

Elite Alpha Trooper Catch Upgrade Kit

The above image illustrates how little the Elite Alpha Trooper's catch plate changed between design iterations. A small bulkhead of plastic was added to the plate in order to accommodate the new plunger system but that was it. The remainder of the bracing plastic and the wing slots for the plunger flanges remain to provide a catch plate that flexes and fails under enhanced load.

Our inproved 3D printed catch plate provides a much neater solution by being designed exclusively for the Elite Alpha Trooper. It possesses a much deeper ledge for bracing the plunger assembly against and a thicker holding bulkhead for the plunger. It's much stronger and less pliable than the original. There's no need for upgraded catch plate springs, just a simple improved catch.

Our new catch can be had with a spring for £8 (inc VAT at 20%) from our website.

Wednesday, 8 July 2015

MkII 'Miranda' Pattern Magazine Holders

We've been working to refine our budget range magazine holders over the last few months. The current shock cord design is proving a little problematic in the price bracket it's in. To that end, we needed to find something that would fill the 'economy' price bracket magazine that we know the HvZ and student populations crave.

Meet our MkII 'Miranda' Pattern Magazine Holders. They represent something of a paradigm shift compared to our previous iterations and there are number of reasons for that. And yes, they are named for Miranda in Serenity.

First and foremost, you'll notice they're flapped. Too often have I lost darts at Green Cloaks events where I've been crawling through ferns and underbrush so these pouches solve that particular problem. Of course, I'm not a huge fan of flaps for ease of access. To that end, we added a small tab of Velcro to the inside of the pouch and made them deep enough to carry their required number of magazines. The flap can then be tucked behind the magazines in order to provide ready access without needing to fight through a pouch.
With a couple of these on your MOLLE vest or belt, you can have one in a 'ready' state while the others are in reserve. These pouches are designed to be both magazine holder and dump pouch in one. You cycle the magazines from front to back, removing from the front and replacing the spent magazines in the back. The weight of the magazine creates a handy aperture that's easy to re-insert a magazine into.

MOLLE Mounted Versions:
Our MOLLE mounted version still relies on our MOLLE Attachment Bar system (MAB) but the webbing has been reconfigured to accept MALICE clips, too.

Belt Mounted Versions:
The belt mounted versions are reverting to our universal belt loop system with the addition of a snap fastener at the bottom to really secure the hold. This feature was added after this weekend at Green Cloaks Event 3: Into the Rad where I had multiple failures of my Firestrike belt mounted holster that argued with my vest rig. In the end, adding a pop snap solved the problem.

UPDATE:  We've replaced the belt system with a new strap system. Installation instructions on that can be found here.


These versions will be available in our full range of colours rather than just black and camouflage. Black double and triple pouches will be £8 and £10 respectively with an extra £1 for colours. Camouflages with matched fittings and straps will be available, too.

The future of our shock cord retention pouches:
The shock cord retention pouches that we currently supply do have a future. However, we would like to do a better job on them and so they will be bumped up to our 'premium' bracket where they will have sewn, reinforced PALS legs that thread into MOLLE and the like. The price will rise to match and it's too early to say how much that might be.

UPDATE: Nope, the old shock cord pouches don't have a future. We're only supplying Mirandas from here on out. We can't commission the old versions even if we wanted to because the fabric we used literally no longer exists. It was made by 1 mill in the world (up in Lancashire, UK) who no longer supply it. We can't make the old design in any other fabric so we're only supplying these now.


The MkII 'Miranda' pouches go on sale on our website from Friday 10th July 2015.

Thursday, 14 May 2015

Prototype: Full Tactical Vest

Tactical vests are an interesting thing. We've avoided providing a full one for a while because we figured that people could just grab one from their local army surplus store, throw some pouches on there and be done with it. Between a visit to our local surplus store and regular contact with the fine folks at Green Cloaks here in the UK, we found we were wrong. I spent an hour rummaging through our local store (Marcruss Outdoors here in Bristol) and found that, surplus Osprey body armour covers aside, the vests on offer weren't particularly appealing for the mil-sim LARPer. For example, this Mil Tec MOLLE Vest was available for £30. I checked the label and it's made from toughened polyester which seemed a little odd but I suppose you can't expect Cordura in that price range. Toughened polyester is fine but Cordura is infinitely better. There were others like it in similar price brackets and none of them had in built magazine storage.

Upon my return to the office, I started putting together a design for a vest that's built from our usual Cordura and had inbuilt magazine pouches. Sling loops were included, too, because I personally love the idea of a 1 point tactical sling run through loops on my left shoulder. We've adopted a new policy here in the office: the designer of the item has to produce the first prototype. The idea is to stop us from producing something that's impossible for the production team to build. While I don't have the world's best sewing skills, it's certainly worked to keep designs simple yet effective. Here it is shown over a set of black motocross armour for contrast and because it shows a typical usage case for something like Green Cloaks.

This is the first prototype out of the gate. There are a couple of bugs to fix but we've tried to balance affordability with efficacy. It's built from our usual high quality Cordura nylon and is padded with our 3mm spacer mesh for full breath-ability and comfort. The sling loops are just about visible on the shoulders but come as standard. The design is supposed to offer a complete off the shelf solution without needing to add further pouches and such. The MOLLE coverage allows for optional additions as and where necessary.

Most importantly, this particular line will be our first offering in a variety of sizes. While custom sizing is our preference, sizing options will give us the ability to sell things in a way we're not used to. Players and clients will be able to choose from a range in the field without having to wait for us to produce something fitted to them. Of course, we'll retain the custom option at no extra charge for those that are prepared to wait.

Changes for the final production version include:
  • Reinforced magazine pouch apertures for easier magazine insertion - the current single layer of Cordura and edging tape isn't enough
  • Change the edging tape colour from olive to army green
  • Altering the position of closure buckles to prevent gaping
  • Droping the neckline by a few mm to prevent it getting all up in your throat
  • Velcro loop tape at the top of the vest will be replaced by just MOLLE Velcro loop tape rather than the current alternating system.
We're also exploring the option of adding interior pouches for armour panels. A number of LARP systems require rigid plating to count as armour for role play purposes while other players have requested space for extra padding simply to deaden the impact of a round travelling at 300FPS (I'm looking at you Australia :P). We'll probably have that as an add-on option for an extra £10 or so. Plates will be sold separately and we'll probably provide a template for them to make life easier for people wanting to make their own.

Current working price for this off the shelf in black will be £60 inc VAT or £70 inc VAT for Flecktarn and British Woodland DPM (as shown above). It'll be a couple of weeks before we get all the bugs worked out but the prototype will certainly see action next month at Green Cloaks Event 2. Watch this space. :)

EDIT:

So we tested it Event 2 and it came through with flying colours. We'll get a black one made up in the not too distant future and get it on the website. It's pictured above with the sling loops in action and Velcro patches in place. :D

Thursday, 8 January 2015

Stampede Wiring Kit: Revision 2

In our first new product for 2015, we've added a few new upgrades to the Stampede wiring kit. There have been a number of tweaks including adding an LED mount for your master power switch and some key protections added for this ageing fleet of blasters.

Inline fuse holders, fuses and relays!


With more modern N-Strike Elite magazines, we've identifed a failure mode that is fatal to the Stampede motor when using high powered Lithium chemistry batteries. The differences in the moulds between N-Strike magazines and the newer N-Strike Elite magazines are sufficient to cause a misalignment in the bolt during the firing cycle. This causes a collision with the forward dart tooth and resultant stall. Given the high discharge capacity of Lithium packs, it's often the case the battery is able to continuously discharge enough current to oxidise the motor coils and set fire to the internals of the blaster (literally in one case).

To that end, enter car blade fuses. We've determined that a single 10A car fuse soldered into the battery tray will happily protect the blaster and its internals from the aforementioned failures. Yes, it might mean you have to tape a set of fuses to the inside of your blaster but we figure most people would rather have a dead fuse than a blaster. We did look into resettable options but the blade fuses are far more economical compared to PTCs and methods that would have introduced a significant current restriction. The other advantages of a blade fuse is that it can handle burst currents for the necessary length of time without tripping. This sort of behaviour is commonly seen in the automotive industry so it seems like a sane standard to adopt here.

New 12V relays!
A second change sees the replacement of the firing micro-switch with a 12V relay instead. This changes means that the blaster can now use its stock trigger switch to fire the blaster using low current wire through the relay. This solves the problem some users were experiencing with placing the switch and removes the need for the trial and error placement process that is required by the Version 1 system. There are also advantages in preventing timing bugs that may occur as the white trigger plate inappropriately triggers the next trigger cycle when using our current micro-switch set up. It is important to note, however, that our kit now requires either 3S LiPo or 3S LiFe to fire, anything higher than 12V will destroy the relay coil and render your blaster useless.

Unfortunately, it does mean that the kit will have to increase in price to accommodate the new features but we don't really have a way to avoid this and we've kept the increases to a minimum.

The new version will be available as of Monday 19th January 2014 for £18.50 (including UK VAT at 20% so £15.41 for non-EU customers). All orders placed on or after that date (UK time) will be filled with the Revision 2 kit and priced accordingly.

Wednesday, 24 December 2014

Fresh Magazine Holders

We've been doing some work with our suppliers and generally developing our range of 18/12 dart box magazine holders. Since we converted them to MOLLE Attachment Bars back in October, we've been expanding the range of available of camouflage fabrics. We've been working with our suppliers to reduce the cost of trim matched variants and have managed to pass those savings onto our clients. There are a number of price drops and changes. We've removed singles as they didn't sell terribly well and aren't a great economy in terms of production. Our Hex and Quad stacks still offer great value for money and exploit the full flexibility of the MOLLE system.

Early stage Woodland DPM holder, the Khaki thread has been upgraded to Olive
Rather than producing multiple listings, we've streamlined them all into one listing and simplified the options. This has allowed us to introduce drop-leg variants across all camouflage fabrics at the click of a button.


The other great news about our 18/12 magazine holders is that they can hold the 15 dart curved 'Worker' magazines that are currently coming out of China. They're good and secure in there and don't occlude any box magazines they might be alongside.

The new listings are available here, subject to our usual 2 week lead time. We're currently closed for a Christmas break (auto-posting bot FTW!) so any orders will be taken as being placed on 5th January. :)

Thursday, 16 October 2014

Blastersmiths UK & BlasterTECH announce partnership!

Blastersmiths UK and BlasterTECH today announced a working partnership that they hope will be beneficial to both companies. BlasterTECH is an emergent wiring loom and electrical modification company based in Brisbane, Australia. They have recently started selling wiring looms through their website, BlasterTECH.com.au with the aim of lowering the threshold to entry for the average Nerf modder. Blastersmiths UK already sells an array of un-soldered kits and 3D printed parts so a trading partnership seemed like the natural step forward for the two companies.

The two companies first encountered one another through BritNerf.co.uk, the UK's primary Nerf forum. Mike, from Blastersmiths UK, and Dean, from BlasterTECH, got chatting around electrical modification and the potential of selling modified blasters. Regrettably, the regulatory environments in both the EU and Australia prevent the sale of fully modified blasters on their own at the commercial level but kits and pre-soldered looms can be sold in the EU and Australia respectively. BlasterTECH moved forwards with their wiring looms and accepted the offer of distributor in order to resell 3D printed components and some tactical gear in order to fund future development.

Australian customers can purchase BlasterTECH wiring looms direct from their website (www.blastertech.com.au) with immediate effect and from the 1st November 2014 will be able to access a wider array of Blastersmiths UK products without the risks of international shipping or the wait that comes with lead times for custom made goods. All Blastersmiths UK products listed on BlasterTECH.com.au will be available in stock for immediate dispatch in accordance with BlasterTECH shipping policies.

Looking to the future, the two companies are looking to work closely on further developing kits and looms for the full range of electronic foam dart blasters, including Nerf's Elite Demolisher 2-in-1. There is a great deal of untapped potential in the many electronic blasters out there and the two companies are looking forward to tapping that and bringing new products to the foam dart blaster marketplace.

/pressrelease

So what does this all mean?

In the midst of all the hype about our MABs and such, we're lucky enough to be able to announce our first Australian distributor for our second largest market. No more international shipping risks or waits on lead times, it'll all be there in your back garden without the fuss of international orders. From November 1st, it'll be there for you to buy straight up. From holster and slings to Rapidstrike kits, it'll all be either Blastersmiths UK original stuff or Blastersmiths UK Certified stuff. :)

Better yet, the folks here at BSUK and over at BlasterTECH are teaming up to feed into some pretty exciting new projects for electrical blasters in the coming months.

It's an exciting time for the hobby, keep your eyes open for more stuff as it develops.

Wednesday, 15 October 2014

In-depth: MOLLE Attachment Bars

We're always striving to find new ways to improve our products here at Blastersmiths UK and our use of the MOLLE system of pouch and holster attachment has always been at the centre of that. The flexibility offered by the system is a cornerstone to our ethos of bespoke gear to every individual player. However, we feel our current Velcro attachment system using interlocking loops of Velcro loop tape is far too limiting and has some serious drawbacks. Instead, we've created a unique fusion of the 3D printed and the sewn.

Introducing our new 3D printed PLA MOLLE Attachment Bar (MAB) designed for use with our webbing equipment. Inspired by MALICE clips, PLCE webbing clips and other extant items, we sought to bring such extant technologies into the Nerf and general foam dart blaster space. The flexibility of the printed PLA plastic allows the bar to be woven between the webbing straps of two compatible items while the small raised ramp locks the items in place in a fashion that will not shift.

MABs have further advantages insofar as they offer rigid support to magazine pouches. By providing a spine to slide the magazine along, aperture fouling becomes less of a problem so there's less faff with your gear and in turn you've more time to be playing the games you love with the kit you've bought.
To release the bars, you simply twist them gently and with a rocking motion, you can ease them free of the webbing for use elsewhere. We will supply 2 variants, the 3 strap version demonstrated above and a 2 strap version that will cost less and lacks a feature we will discuss presently.

With the long, 3 strap MAB variant, simply skipping a row during the weaving process, creates a belt loop that will readily accommodate a 2" (50mm) tactical belt as pictured above. For the first time, we can offer true belt and MOLLE compatibility in a single product. Better yet, a true belt mounted MkIV Pistol holster is viable as proven during combat testing at the 2nd BritNerf Annual General War in September (more on that in another blog post but no more half drops or thigh straps!).

The development of our MOLLE Attachment Bars has also offered us the opportunity to redesign and respecify a few of our key products. All our magazine holders will now be compatible with the system as will our zip dump pouches. The upshot of the MOLLE/Belt compatibility will be a more streamlined website experience which in turn allows us to offer a wider array of colours and camouflage patterns compared to our current black only option.

These bars will be available on the following products from 17th October 2014 via order from our website.
  • Zip Dump Pouches
  • Magazine Holders (Box and Drum varieties)
Further products will be converted to the new system in short order. Oh and there won't be any price difference, just an enhanced experience for foam dart players everywhere! :)

Monday, 14 July 2014

Burst Fire Module - Features and Development Plans

We've been working pretty hard on this one in the background - it's something people have wanted for a while and something we feel we can provide. A module that allows your fully automatic blaster to select a size of burst but to retain full firing functionality in the event of failure. The first bit is the easy bit. The second, a little harder.

This demonstration video from Foam Data Services shows off the current Revision 2 module as it stands. It has an annoying firing action that we have a fix for, we're just waiting for the new prototype boards to arrive from the manufacturer.


As you can see, we've made the interface on the Rapidstrike variant as streamlined as possible. The interface stack is all within ready reach of the user's trigger finger and can be manipulated without removing your hand from the pistol grip. As left handed users ourselves, that's a little annoying but given the handed nature of the internals (due to the clam shell design) it's far more parsimonious to leave the interface on the right hand side. A lefty friendly version is possible but it will involve ribbon cables and our technical team crying.

We'll take you through a quick walk through of some of the nifty features and tricks that make this build really come to life. So you have the module itself, our in house version is currently fitted to our Rapidstrike test development mule in a big ugly black box. As you can probably see, there's a lot less vertical clearance in OldNoob's version, we've already managed to slim down the box and think we can go even further with it! Getting it flush is the aim but we'll take anything we can get. This blaster is a little dusty after combat testing at Green Cloaks Event 2 back in June. The interior has been thoroughly cleaned but the exterior has some left over to a little bit of 'character'.


Note the power switch tucked away in that little recess. That location was chosen to prevent you accidentally turning the module off during play. The volt meter is placed so you can get a decent read on it while holding the blaster and the grilles in the case are there for a 40mm north bridge fan. We've since been able to eliminate the need for a fan (slim line heat sinks and proper power management FTW!) and that's gone a long way to dropping the vertical ceiling of the case. We could readily substitute the grilles and volt meter for logos and text. Given that there are internal LEDs there by necessity, you could easily have light up text and logos on your module.


From this side, we can see the control stack. The first thing you ought to notice is that it's theoretically possible to eliminate the need for a lid all together and that's our ultimate goal. All of those controls are reachable with your trigger finger so you don't need to adjust the position of the blaster to fire in the event you want to change modes. The switch at the bottom of the stack is the select mode switch, it sends a pulse to the micro-controller which tells it to change mode and the LED at the top changes accordingly. In the photo above it's flashing red because the magazine inserted into the blaster is empty. The middle switch is the 'stealth mode' switch which allows you to run the blaster without any lights. This doesn't interfere with the operation of the module at all but of course, you will need to un-stealth in order to determine which mode you're in. Finally, the top LED is an 8mm through hole NeoPixel LED with 24bit colour, combine that with the micro-controller's onboard memory and you can get up to 400 controllable burst sizes with this prototype alone. Of course, you've got to find 400 readily differentiated colours in order to make that happen but hey, it's a possibility.


A view through the grilles begins to give you an idea as to why this isn't a user serviceable item, yet. All that wiring is just the start. Granted, the Reaper that OldNoob displayed in his video is much neater and hasn't been developed on but it's still not the friendliest thing in the world.


Remove the lid and you can see the beating heart of the system. The MOSFET in its TO-220 package are buried under wires on the left while the system's thriving brain, a Digistump Digispark is hidden in the bottom right under the JST plugs for the fan and voltmeter. The electrical tape, while an electrical sin in production builds, is a necessary part of the development process!

Single shot in blue
3 dart burst in green

5 round burst in white
The three images above illustrate the three firing modes and their respective indicator LEDs. These colours were chosen to avoid problems with red/green colour blindness but of course, people would be welcome to alter the code to make things different colours as this will be an Open Source project (more later).


Dart sensing is done via simple IR photo-diode and LED. There is one here in the magazine well and another in the pusher mechanism. They provide a reliable (mostly) way of tracking the state of the blaster. That's a 3D printed insert for the photo-diode in the picture above and there is a mirrored version on the opposite side.


The red light is coming from an LED sitting above the pusher mechanism housing to the right of this picture. It's a standard feature in our RS builds these days and serves to protect your night vision when clearing jams in low light conditions. It's a handy reuse of the extant jam door switch.

So what's for the future? Well, I've already said we've got a fix for the annoying trigger action. The functionality there will allow us to add some new and other interesting on board sensing stuff in the future if we wanted to. Additionally, we're looking to internalise the interface as much as possible. Having a big box on the side isn't the world's best solution and we'd like to fix that. However without losing the collapsible stock, or taking up large amounts of space in the forward battery tray, there aren't a great deal of options.

Once we get to Revision 3, this project will be Open Source. We'll publish the schematics and parts list for public, non-commercial use so hobbyists and modders can make their own, remix it all and support the project with commits.

For the rest of us mere mortals, we'll be looking to crowd source the funding for deployment of a plug in version of the module including necessary regulatory clearance for sale in the EU and North America. That's our biggest sticking point at the moment, EMC test certification is awkward and expensive. More details on that will follow once we've got Revision 3 up, running and Open Source. Aim price point is £65 inc VAT but that may go up or down depending on how the process works out for us.

Both Revision 2 and 3 modules are cross compatible with the Stampede and Vulcan, too. The Rapidstrike is the much more technically challenging build because of the flywheel system and so there's plenty of backwards compatibility right there. We have a Stampede inbound that will get the full BF treatment and there will be photos when that's done.

So there you have it. The early days of the first Open Source hardware for an after market dart blaster product. We'd like to thank Foam Data Services for making this one possible, without them they wouldn't have been able to get this project out of our notebooks and into reality. We'd also like to thank the lovely folks at Trinity Games for providing us with a willing victim (or 80) to test this on at Green Cloaks Event 2. Without all of you, this wouldn't be possible. Onward, to getting this into the hands of our loyal fans!